Technology Exposé:
Image Processing
High resolution images have always played an important role in yield learning, but at today’s feature sizes these images are taking on a whole new significance. Investment in SEM and E-Beam tools has been increasing, and the throughput of these tools has been increasing as well.
Anchor’s seminal product was a Post-RET Verification (PRV) tool that employs lithography models to simulate printed wafer images and identify weak patterns. This is an image-intensive application that demonstrates Anchor’s longstanding expertise in image processing technology.
Today, Anchor understands the importance of applying image processing technology to the production Fab, and has developed products such as D2DB-Image Explorer and D2DB-Pattern Monitor.
In this section we examine some of the image processing capabilities offered by Anchor across various products.
There is a wealth of information contained in high resolution images, but the information is not fully exploited, and many images such as SEM Non-Visual (SNV) are simply discarded, resulting in a significant reduction in the return on investment of expensive imaging tools.
Some of Anchor’s image processing capabilities for the Fab include:
These are described in the sections that follow.
Anchor’s seminal product was a Post-RET Verification (PRV) tool that employs lithography models to simulate printed wafer images and identify weak patterns. This is an image-intensive application that demonstrates Anchor’s longstanding expertise in image processing technology.
Today, Anchor understands the importance of applying image processing technology to the production Fab, and has developed products such as D2DB-Image Explorer and D2DB-Pattern Monitor.
In this section we examine some of the image processing capabilities offered by Anchor across various products.
There is a wealth of information contained in high resolution images, but the information is not fully exploited, and many images such as SEM Non-Visual (SNV) are simply discarded, resulting in a significant reduction in the return on investment of expensive imaging tools.
Some of Anchor’s image processing capabilities for the Fab include:
- Pattern (contour) extraction.
- Contour to layout conversion.
- Contour alignment to design.
- Contour search.
- Layout to contour conversion.
- Measurement.
- Defect detection.
- Image stitching.
These are described in the sections that follow.
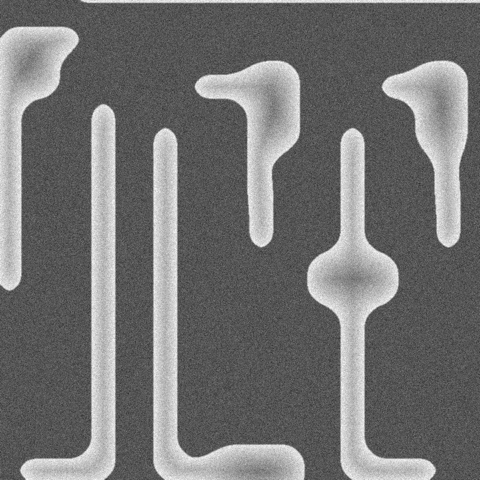
Image Processing begins with an image! When working with high resolution images, the first step is contour extraction, but this is more challenging than it seems. Contour extraction algorithms are governed by several parameters, much like recipe parameters in an inspection tool. If these parameters are not tuned properly, the resulting contour may be unusable.
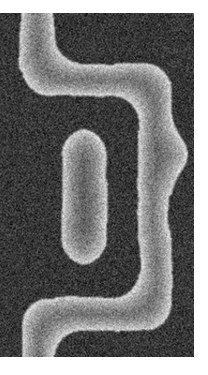
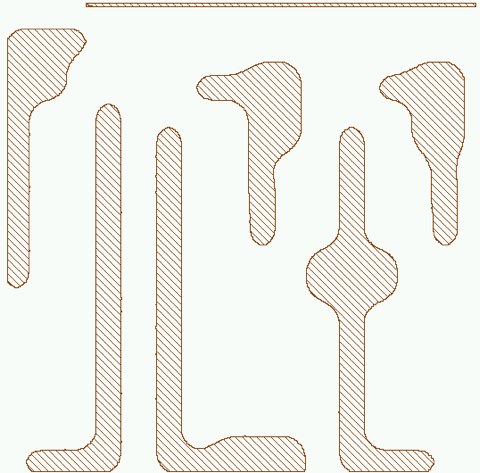
Because image quality varies widely from wafer to wafer, layer to layer, tool to tool, and even day to day, it would simply be impractical to tune contour extraction parameters manually. That is why Anchor has developed automatic parameter setup, which examines every image individually and customizes contour extraction parameters for each and every image. For the (relatively clean) SEM image above, the resulting contour (with automatic parameter setup) is shown here.
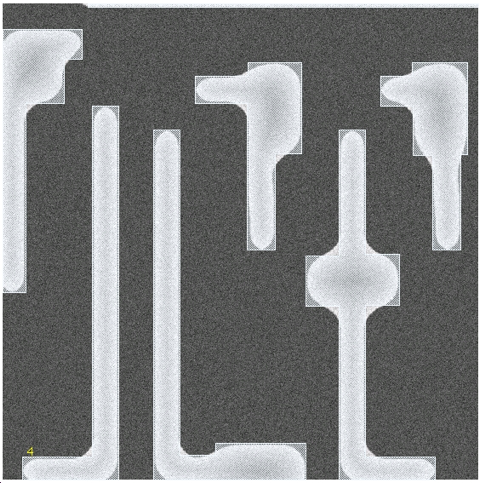
Once a contour has been extracted, it is often necessary to find that contour in the physical layout or design file (GDS / OASIS) and align the two together. Despite line edge roughness and corner rounding in all extracted contours, Anchor’s alignment engine is able to match that with the straight lines and perfect corners of a Manhattan layout. The resulting alignment and overlay is shown here.
Contour alignment is designed for use cases where a starting location is known, such as a defect coordinate. Defect coordinates contain some amount of stage and measurement error, which means that the coordinate itself cannot be trusted as the true location of the defect. By aligning the image to design, the true coordinate can be determined.
Contour alignment is designed for use cases where a starting location is known, such as a defect coordinate. Defect coordinates contain some amount of stage and measurement error, which means that the coordinate itself cannot be trusted as the true location of the defect. By aligning the image to design, the true coordinate can be determined.
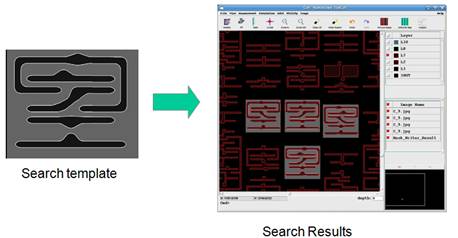
Whereas contour alignment is designed to eliminate coordinate error and therefore corrects for x and y shifts within a small distance from a starting point, Contour Search makes no a priori assumptions, and is designed to operate on the full chip or any subregion. It compensates for rotation and flip in addition to x and y shift. A sample result is shown here.
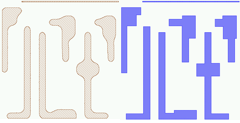
Click to Compare
Anchor provides specialized tools for Contour-to-Layout conversion and vice-versa.
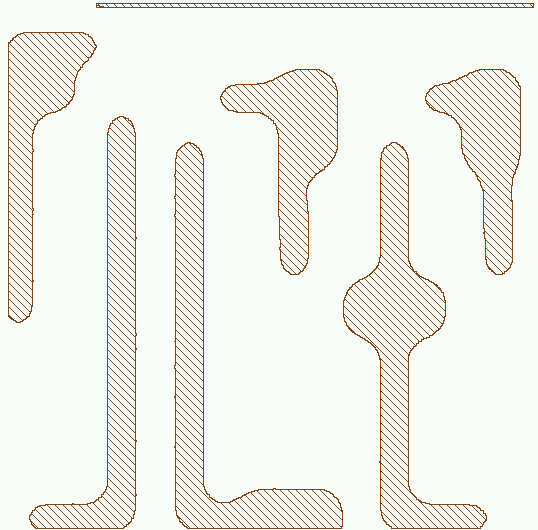
Given an image, contour extraction is first performed to lift the pattern out of the image. The resulting contour is then converted to resemble Manhattan geometry, as shown here.
Given an image, contour extraction is first performed to lift the pattern out of the image. The resulting contour is then converted to resemble Manhattan geometry, as shown here.
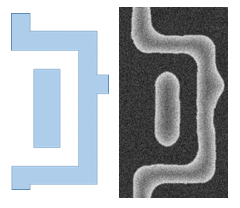
Click to Compare
Layout-to-Contour conversion is illustrated here, but it is taken one step further to create a pseudo-SEM image from the contour. Several parameters are available to control background noise, line edge intensity, and other properties of the simulated SEM image.
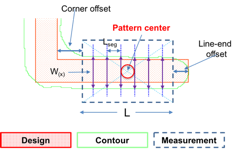
If a suitably small pixel size is used, usable measurements can be made of line widths and line spaces. Anchor provides two measurement methods in its D2DB-Pattern Monitor product. The first method is Contour Based Measurement, which is highly dependent on the contour extraction recipe settings that were used. Nevertheless, it is a often a good-enough method when the actual value is not as important as the overall trend between multiple measurements.
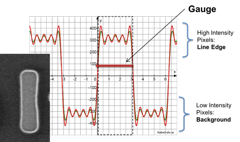
The alternative to Contour Based Measurement is Intensity Based Measurement. This requires a little more input from the user, which allows for greater fine-tuning of the measurement. In the figure to the left, we can see a SEM image of a small line. The graph shows the grayscale values as we trace a line from the middle-left to the middle-right of the SEM image. We can see that there are several possible values for the width of the line, as shown by the outer and inter slopes. The user can specify the location of the ‘gauge’ along these slopes as shown.
Once a contour has been extracted and aligned to design, deviations between the two can be calculated and classified. Anchor’s D2DB-Pattern Monitor and D2DB-Image Explorer products provide 6 types of defect detection and classification, with more types being developed.
